

How to perfectly fit a pocket door

Installing a pocket door into your home is a great way to save space while providing rooms with extra space and elegant finishes. Although the process can take time, with more intricacies than traditional door structures, this guide will help you to fit your pocket doors simply so you can enjoy your home’s new look as soon as possible.
At Handles 4 Homes, we stock an eclectic range of pocket door hardware so you can personalise your doors to suit your home’s decor. We have also provided instructions on installing your hardware, meaning you can find everything you need here to keep the procedure easy and accessible.
Table of Contents
- What is a pocket door?
- How to install a pocket door
- How to install pocket door hardware
- How to replace pocket door hardware
What is a pocket door?
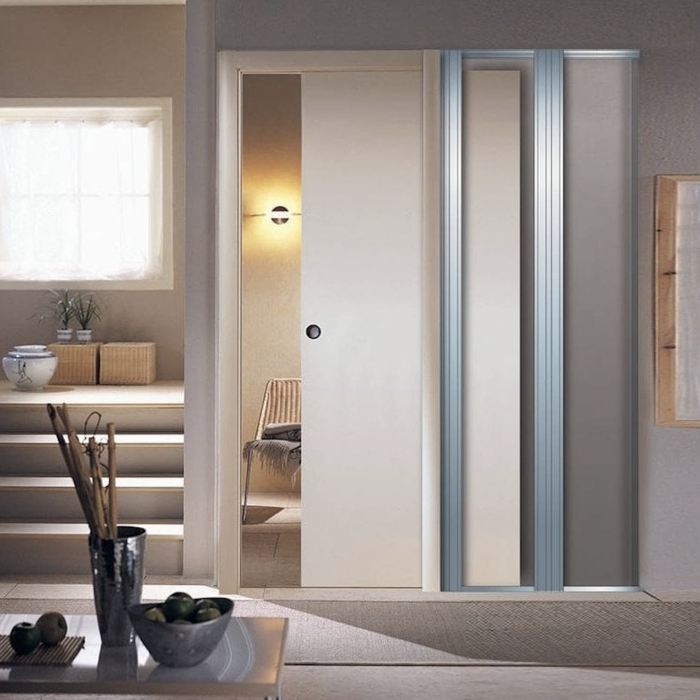
A pocket door is a sliding door that, when opened, sits in the cavity of your wall and out of view, giving your home maximum space and a sleek appearance. Pocket doors can be fitted singularly or as a pair, depending on the size of the room. As pocket doors are installed onto a track with moveable rollers, it is important to gauge what size track will be most appropriate.
What are the benefits of a pocket door?
Along with their space-saving features, pocket doors are practical, given their endless personalisation, able to serve as aesthetic additions to your home or means of extra privacy. Whether you choose a pocket door that is laminated, painted or wood-veneered to make for a solid partition or a glazed look for a decorative feel, you can adapt them to suit any room and function without compromising sophistication.
How to install a pocket door
Before you install a pocket door, you must consider important factors to ensure a time and cost-effective process:
- Tools you will need: Pocket door gear or kit, pocket door hardware (if not included in your kit), a door frame and jamb kit, screwdriver, measuring tape, level, stud finder, drill and drill bits, saw, hammer, nails, utility knife, wood shims, construction adhesive, safety goggles and gloves.
- Gauge the thickness of your walls, as pocket doors need approximately 4.5 inches of space to sit correctly within a cavity.
- Choose a door that aligns with the wall opening and cavity measurements.
- Purchase high-quality tracks and rollers to ensure the efficiency and longevity of your pocket door.
Prepare your wall
- Firstly, remove the door that is already fitted if applicable. Once completed, or if you are installing your pocket door into a new area of your wall, ensure your wall measurements allow your pocket door to easily slide into the cavity by measuring the space within the wall and the width of the door.
- Check that inside the wall is safe to fit your pocket door using a stud finder to locate any studs, plumbing or electrical wires. Once you are certain the area of the wall is suitable, remove any plaster or drywall.
- Take out the studs within the area where you intend to install your pocket door and reroute any electrical wires to avoid obstructions or hazards.
Fit the header
- If you removed any studs when preparing your wall, installing a new header that supports the load above your door may be necessary. The header sits horizontally at the top of the pocket door opening.
- You may need a new header if you require a new soleplate at the base of your wallframe as this will alter the overall height of the space your door will be fitted. You can determine your new header height by working out the length of your new door plus 3.25” and the height of the soleplate, if applicable.
- You can then install a new stud that aligns with the new length from the existing stud on the opposite side of the opening. Nail or screw your new header in place and secure the soleplate to the floor.
Fit the pocket door frame

- Your pocket door kit will have instructions for your chosen brand and model. The frame is constructed of side jambs and a split stud, which enables the door to slide into the wall. Secure the frame to the header, which should then be fixed to the wall studs.
Fit the track
- Secure the track to the header using a level to ensure accuracy. The track must sit evenly as this enables your door to slide. If fitted incorrectly, your pocket door will not move easily and may be damaged.
- Use the instructions provided with your pocket door kit for this step, as guidance may vary depending on whether your kit comes with pre-split studs.
Secure the door hangers
- Your kit will contain hangers used to secure the door to the track. Position the hangers following the instructions within the kit; they will usually be placed at the top of the door.
Hook the door onto the track
- Secure your pocket door onto the hangers. Test the mobility of your door to check it slides easily into the wall.
Make any adjustments to your pocket door kit
- If your door does not slide smoothly, make any necessary adjustments regarding height or alignment. You may need to repeat this step several times to ensure accuracy.
Cover your pocket door frame
- Execute a tidy finish to your pocket door frame by reinstalling drywall to conceal it from view. Ensure enough space is left to allow for the door to slide.
Install door trim
- Prevent the visibility of any gaps between the wall and pocket door frame by fitting door trim around the door on both sides. Along with drywall, this will enhance the appearance of the door.
Attach your pocket door hardware to the door
- Your door is ready for any handles or other hardware to be fitted before hanging it onto the track. Full instructions on installing pocket door hardware can be found at the next stage of this guidance.
Personalise the door with your desired finish
- Give your pocket door, frame and trim the best finish to match your home’s interior and decor. While painting is the most traditional finish, you may have other creative ideas that help to exhibit your style and taste.
Check your pocket door works
- With the added personalisation of your hardware and finish, give your door one final check by sliding it into the wall. Adjust the hardware or track if the door hits any obstructions or hazards.
How to install pocket door hardware

At Handles 4 Homes, we are committed to providing our customers with top-quality pocket door hardware. Our brands range from Atlantic Hardware and Freelan Hardware to From The Anvil and can be adjusted to suit any room or interiors, maintaining grandeur throughout your home.
When fitting your pocket door hardware, adapt the following step-by-step guide to the instructions provided with your specific products to install them with precision.
How to install a pocket door lock
- To install your pocket door lock, check your kit is compatible with the thickness of your door before beginning. You will also need a drill or screwdriver, a hammer, chisel, pencil, measuring tape and a spirit level.
- Once you have chosen a compatible lock, mark where you will position it on your pocket door, determining how high up you would like it to sit. Ensure you mark the same height on the door and frame. You also need to gauge the centre point of the door’s width where the lock will be installed.
- Referring to your markings, drill a hole where your lock will be positioned with the appropriate drill bit.
- Cut the recess for where the lock body will sit on your door. You may use a chisel to create the recess, ensuring it correlates with the thickness of the lock body, which should then be able to sit flush with the edge of the door.
- Place your lock body into the area you have carved, checking it sits flush. With the screws provided, secure your lock body onto your pocket door.
- Ensure you close the door to install your strike plate or frame.
- Identify and mark where you will position your latch on the door frame.
- Position the strike plate on your marking and draw around it using your pencil.
- Carve out a recess on the door frame for where your strike plate will go, ensuring it will sit flush.
- Secure the strike plate using the screws provided.
- Test your lock to ensure it is efficient and easy to use. Make adjustments where necessary.
How to install a pocket door pull
- You will need a drill, pencil, screwdriver, measuring tape and chisel to install your pocket door pull.
- Before installing your pull, choose the height you wish to position it and make a marking on your door with a pencil. Ensure also to note the centreline on the edge of the door as this is where the centre of the pull will sit.
- If applicable to your pocket door handle, you must prepare a recessed area. Referring to your centre point, drill a hole using the appropriate-sized drill bit.
- Using a chisel, cut the recess for where the pull will sit on your door. The depth of the area should be sized carefully so the pull can sit flush with the door.
- Place the pocket door pull into the the recessed area and ensure it fits securely. Make any necessary adjustments with the chisel if it is too tight.
- When satisfied with the fit, Cut the recess for where the lock body will sit on your door in your hardware kit. Do not over-tighten the screws, as this may damage your door.
- Check the pull works smoothly and the door does not face any obstruction when moving. For a neat finish, complete any sanding or extra chiselling that may be required around the edges of your door and pull.
How to replace pocket door hardware
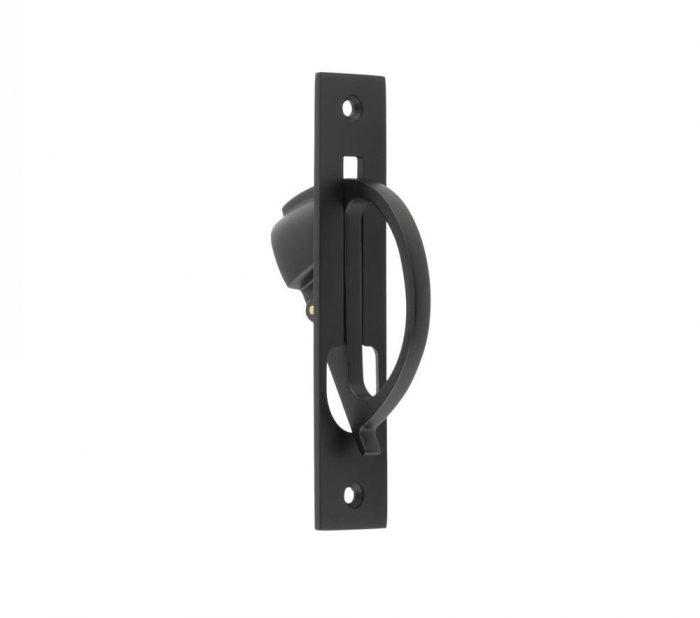
How to replace a pocket door lock
- Before replacing your pocket door lock, ensure you have your replacement lock and a screwdriver.
- With the door open, locate the screws on the edge of the lock, as these are holding the lock in place. Unscrew the face plate and carefully remove the screws, also checking for any screws on the side of the latch.
- Gently remove the lock to avoid damage to your door.
- Now that the recessed area is exposed clean it and ensure no obstructions or damage around it.
- For extra peace of mind, check the dimensions of the recessed area and measure these up with the size of your replacement lock.
- Place the new lock into your pocket door. Gauge whether it aligns with the existing screw holes and the latch and make necessary adjustments.
- Screw the faceplate into place to cover the lock mechanism. You should not over-tighten the screws as your door or your lock may suffer damage.
- Check your lock works with ease when locking and unlocking. If applicable, adjust any positionings if there are any alignment issues.
How to replace a pocket door pull
- Before replacing your pocket door pull, ensure you have your replacement pull and a screwdriver.
- To remove your old pull, open the door on which it sits and locate the screws. Your screws will most likely be fitted onto the faceplate or the recessed area of the pull.
- Carefully remove your screws and secure them if you plan to reuse them. Your new pocket door pull should come with the necessary replacements.
- Take your old pull out of the recessed area. To prevent damage to your door, you may wish to use a flat tool to encourage easier removal.
- Now that the recessed area is exposed clean it and ensure no obstructions or damage around it.
- For extra peace of mind, check the dimensions of the recessed area and measure these up with the size of your replacement pull.
- Place the new pull over the recessed area, positioning your screws through it and into the holes that will already be in the door. If the holes do not align with your new pull, make necessary adjustments with a drill and an appropriately sized drill bit.
- Secure the screws through the pull and into the door. Do not overtighten the screws, as this may damage your door or pull.
- Check that your new door pull works nicely and sits flush with the door.
Purchase your pocket door equipment from Handles 4 Homes!
Find everything you need for your project in one place by choosing Handles 4 Homes.
While our Scrigno range contains the perfect pocket door kits, the polished brass, satin chrome and black finishes of our pocket door ironmongery grant you limitless opportunities to add cohesion to your home down to the finest details.
Discover your favourite pocket door equipment from Handles 4 Homes today and qualify for Free UK Delivery on orders over £70!

Comments are closed here.